
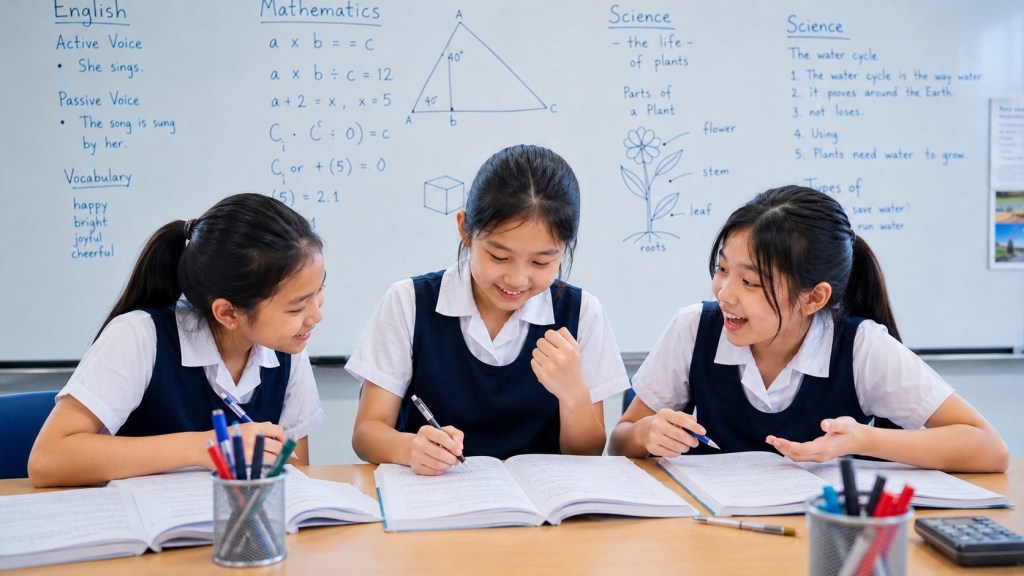
The virtual card slides towards the lamp. Its shadow grows. Alicia moves it back, then forward again. The screen responds instantly, cleanly and without a single ruler falling over.
“I have proved it,” she says.
Beatrice asks a more careful question: “Have we tested the rule inside the model, or measured a real shadow?”
Both kinds of activity can help a child learn. They do not produce the same kind of evidence. A useful simulation lesson makes that distinction clearer, not less important.
A simulation is a model that can respond to changed inputs. A virtual investigation becomes scientific when the learner states the question, controls the changes, records the output and explains where the model’s authority stops.
This guide is part of the Primary 4 Science Learning Hub. It develops a guided-use method for teacher-selected simulations. It is not a claim that a particular app, account or device is compulsory in Primary 4 Science.
The classroom conversations, virtual setups and numerical records below are original teaching examples. They are not screenshots, measured results or reports of running a named commercial or educational simulation. When a real provider is discussed, its official source is linked separately.
Begin with the scientific job, not the animation
A moving picture can attract attention before a learner knows what to look for. The first question should therefore be: “What relationship are we trying to understand?” For a shadow lesson, that may be how one specified distance affects the shadow on a fixed screen. For a temperature lesson, it may be how a change is calculated from starting and final values.
The University of Colorado’s PhET project provides guidance for small-group and independent simulation work using carefully designed activity sheets. Its whole-class teaching guidance also describes prediction, discussion and interactive demonstrations with a single projected simulation. These references support lesson design; they do not establish that every simulation is appropriate for every Primary 4 topic.
| Learning need | Begin with | What the learner should produce |
|---|---|---|
| Too much clicking, too little explanation | A question and a prediction | A written expectation before running |
| Several settings change together | Inputs, controls and resets | A reproducible starting-state record |
| The output looks convincing | Model output and real evidence | A correctly labelled conclusion |
| The child succeeds only on the screen | Returning to real apparatus | An independent transfer explanation |
| A complete lesson is needed | The guided investigation workshop | A prediction, run record and revised explanation |
| Understanding needs checking | Practice and worked decisions | Reasoned choices rather than remembered clicks |
1. What exactly is being simulated?
A simulation contains choices made by its designers. It represents some features, simplifies others and leaves some out. A virtual torch may stand for a light source without representing its battery, wiring, weight or every detail of its beam. That is not automatically a defect. The question is whether the chosen representation is suitable for the learning task.
Before using a simulation, ask the learner to identify the represented objects, the changeable inputs and the displayed outputs. These three categories provide a simple map of the tool.
In an imagined shadow model, the represented objects are a source, a blocking card and a screen. An input could be the distance between source and card. An output could be the width of the modelled shadow. A display feature might show selected light paths. These are different roles, even though all appear on the same screen.
A picture is not necessarily a measurement
A shadow drawn twice as wide on the display does not automatically mean that a real shadow has doubled in centimetres. The software may resize its view when the window changes. A zoom control can enlarge everything without changing the model’s physical settings.
Use the tool’s stated quantities and units where they are provided. If it supplies only a qualitative representation, make qualitative observations rather than inventing a numerical measurement. A pupil should not hold a ruler against an arbitrarily zoomed screen and call the result a real-world shadow width.
An arrow must still have a defined meaning
Some arrows show motion. Others show a selected path, energy transfer, sequence or the direction of a force in a more advanced model. The presence of an arrow does not remove the need to read its role.
For the P4 lesson, use only representations that support the intended concept. A tool can contain advanced features that the teacher chooses not to use. Hidden complexity should not become an accidental requirement that the child explain ideas outside the current learning purpose.
The model should have a declared boundary
Complete two sentences: “This model helps us examine…” and “This model does not directly show…”. The second sentence prevents the learner from treating every missing detail as nonexistent in the world.
A digestive-route animation, for example, might help trace a sequence while omitting anatomical detail. A shadow model may show selected paths while omitting the full complexity of a real light source. A temperature model may display calculated values without teaching how to position an actual thermometer.
2. Write the question before touching a control
“Explore this simulation” can be a reasonable first orientation, but it should not be the entire investigation. Once the learner knows what the controls do, the lesson needs a question that can be answered.
Compare “What happens when I move things?” with “What happens to the modelled shadow width when the card moves nearer the source while the screen remains fixed?” The second question identifies the change, the output and an important control.
Write a prediction before running the comparison. It should use the learner’s scientific understanding rather than a guess about the software’s preferred answer. Keep the prediction when the result appears. A mismatch creates a reason to inspect the model or the original explanation.
The prediction should name what remains the same
A pupil may correctly remember a shadow relationship but apply it to the wrong movement. “Nearer” needs a reference point. “Bigger” needs an identified object or output. “The same setup” needs enough detail to reconstruct.
A useful prediction says, “With the source and screen fixed, I expect the shadow to become larger when this card moves towards the source.” This is stronger than “closer means bigger,” because the conditions travel with the relationship.
One question does not forbid later curiosity
If Alicia notices another control and wants to investigate it, record a next question. Finish the current comparison first, or explicitly abandon it and begin a new run with a new question. The problem is not curiosity; it is changing the question invisibly while treating all outputs as part of the same test.
This simple distinction keeps exploration flexible without turning the record into a mixture that cannot support any clear conclusion.
3. Inputs, controls and the starting-state record
A virtual investigation can be confounded just like a physical one. The learner might change object size as well as distance, switch a material setting between runs, or leave a hidden option from an earlier exploration.
The screen may still produce a beautiful result. That does not mean the comparison isolates the intended factor.
Create a short starting-state card. Record the relevant inputs, any selected mode and the quantities being displayed. The amount of detail depends on the task, but another learner should be able to recreate the comparison without guessing.
| Run record | Example entry for an imagined shadow model | Why it matters |
|---|---|---|
| Question | Effect of card–source distance on shadow width | Defines the scientific job |
| Source and screen | Fixed positions | Prevents an unnoticed geometry change |
| Object | Same card size and orientation | Keeps a second variable out of the comparison |
| Input changed | Card–source distance | Identifies the test variable |
| Output read | Modelled shadow width in the tool’s stated units | Separates output from visual appearance |
| Reset method | Return to recorded baseline and verify it | Protects the comparison between runs |
Reset is an action, not proof that the baseline is restored
Different tools implement reset differently. Some restore a whole simulation; others reset only one panel, time counter or object. Check the chosen tool’s instructions and verify the visible settings rather than assuming that any reset button restores every relevant condition.
For children, the practical routine is: reset, inspect, compare with the starting-state card, then run. The inspection is what makes the reset scientifically useful.
Changing the view is not always changing the world
A zoom, pan or display toggle may change what the learner sees without changing the modelled system. A control that moves an object or changes a material may change the system. The pupil should distinguish these actions.
Ask, “Did you change a scientific input, or only the way the output is displayed?” This question can explain why a bigger-looking object on the screen is not necessarily a larger object in the model.
Keep comparisons fair without turning the lesson into a recipe
The teacher can state the investigation question and important constraints without prescribing every click. Let pupils decide which suitable input values to compare, how to organise the record and what output to inspect.
This preserves enquiry. A worksheet that directs every movement and supplies every expected conclusion may demonstrate compliance more than understanding. Conversely, no structure at all can leave a child collecting outputs without knowing their meaning.
4. An imagined shadow investigation, worked carefully
The following numerical record is constructed for teaching. It is not a report from PhET or another named programme. It describes an idealised point-source model: source and screen are 60 model centimetres apart, the card is 4 model centimetres wide, and the card remains perpendicular to the source–screen line.
The child does not need to derive an optics formula. The purpose is to read controlled inputs and outputs and explain a relationship within the stated model.
| Run | Card–source distance / model cm | Source–screen distance / model cm | Card width / model cm | Shadow width / model cm |
|---|---|---|---|---|
| A | 10 | 60 | 4 | 24 |
| B | 20 | 60 | 4 | 12 |
| C | 30 | 60 | 4 | 8 |
The changed input is card–source distance. The output is modelled shadow width. Source–screen distance and card width remain fixed. Across these settings, increasing the card–source distance produces a smaller shadow in the supplied model.
Notice the wording. “In the supplied model” identifies the evidence source. “Across these settings” preserves the range. The table supports a model-based relationship, not a claim that a particular classroom torch produced these exact dimensions.
Why the relationship makes sense
Use the straight-line light idea from the Light, Seeing, Straight Lines and Shadows guide. With a fixed source and receiving screen, moving the same card changes which paths towards the screen are blocked. A boundary-path representation can help the child see why the blocked region changes.
The learner should explain the geometry rather than memorise the three outputs. Otherwise the next diagram, reversed on the page, may appear to require a different rule.
A deliberately flawed fourth run
Suppose Run D places the card 20 model centimetres from the source but doubles its width to 8. The shadow width is then shown as 24 model centimetres. A pupil compares D with C and concludes that moving nearer the source alone caused the entire difference.
The comparison has two changed inputs: position and card width. Even though the outputs fit the supplied idealised model, the pair does not isolate one variable. The correct next action is to hold card width fixed and repeat the intended position comparison.
This case is important because the software can be functioning exactly as designed while the pupil’s investigation remains weak. Not every bad conclusion is a software error.
A prediction before the next setting
Ask what should happen at an intermediate card position, using the same source, screen and card. A qualitative prediction may be enough: the shadow should lie between the neighbouring outputs if the same relationship applies. Do not insist that the learner guess an exact number without a quantitative rule.
Then show the supplied output or run an appropriate teacher-selected model. The learning comes from comparing the prediction with the model and explaining any difference, not from rewarding a lucky exact guess.
5. Model output is not an independent observation of the world
A simulation produces outputs according to its rules and inputs. Re-running it can help test the learner’s understanding, reproduce a model result or reveal an input error. It does not automatically create new empirical evidence that the real world follows those rules.
This is a reasoning distinction, not a criticism of simulations. A map can be useful without being the landscape. A virtual model can make a relationship easier to inspect precisely because it removes details that complicate physical work.
Use different sentence openings for different evidence: “The model predicts…”, “The simulation displays…”, “Our physical measurement showed…”, and “The reference explains…”. These phrases help the child keep the source of each statement visible.
Exact repetition does not establish real-world accuracy
A simple deterministic model may give the same output for the same complete starting state. That is useful for checking whether a run was reproduced. It does not prove that the model includes every relevant feature of a real apparatus.
Other simulations include random variation or changing internal states. Do not teach that all simulations must return identical values. Instead ask what the chosen model is designed to do and which conditions must be restored before comparing runs.
Software output can reveal a mistake in the learner’s setup
If a model gives an unexpected result, first inspect the actual inputs. A card may have moved towards the screen rather than the source. A unit may have changed. The tool may be paused. A previous setting may remain active.
This is not an excuse to dismiss every surprising result. It is a disciplined order of checks: understand what was actually run before changing the scientific explanation.
A model may omit a practical skill entirely
PhET’s research overview explicitly distinguishes conceptual learning goals from hands-on equipment skills that simulations do not address. This supports a task-based decision: use a simulation for the goals it can serve, and use physical practice when the goal includes handling and reading real apparatus.
A child who correctly chooses a virtual thermometer may still need to learn how to position a real thermometer safely and consistently. A child who reads a perfect virtual scale may still need practice with a real shadow edge. These are complementary learning tasks, not contradictory assessments of the child.
6. What a virtual-investigation record should contain
A screenshot preserves one view. It may not preserve all the settings, the selected mode, the history of earlier changes or the question being investigated. A useful record therefore includes a small amount of written context.
Keep the question, relevant starting state, changed input, output, units and explanation. Add a note when the model is qualitative rather than numerical. A short record with these elements is more useful than twenty screenshots whose meaning cannot be reconstructed.
Use a run table
Give each run a label. Record inputs beside outputs rather than in separate unconnected lists. If the programme displays an output in its own scale or model units, retain that description instead of presenting it as a physical measurement.
When a pupil writes down a result, ask them to point to the corresponding input state. This catches copied outputs that belong to a previous run.
Keep the first prediction
The prediction is evidence of the learner’s initial understanding. Do not rewrite it after seeing the output. Add a later explanation: “I predicted this because…; the model showed…; I now think…”.
A prediction can be reasonable and still need revision because the learner missed a condition. That is useful learning evidence. A notebook that pretends every prediction was correct hides the point at which the model became clearer.
Do not copy the programme’s caption as the whole explanation
A label such as “energy transfer” or “shadow” may name a concept without explaining the particular result. The learner should connect the input change to the output in their own account.
Cover the screen after a run and ask for the explanation. Reopen it only to check a specific value or representation. This prevents the display from doing all the explaining for the child.
7. Virtual investigation clinic: common failures and useful repairs
All cases in this section are invented teaching situations. Their purpose is to help a teacher distinguish scientific misunderstanding from interface, recording and comparison errors.
Case 1: the child changes everything
The learner drags the source, resizes the card and moves the screen, then writes that distance changed the shadow.
Repair: return to the question and select one changed input. Record the others. Repeat the comparison with those conditions fixed. The successful animation does not make the investigation controlled.
Case 2: reset changes less than expected
The time counter returns to zero, but the material setting remains from the previous run.
Repair: verify the full starting-state card. A reset action should be understood in the context of the chosen tool. Do not assume that a familiar icon restores everything.
Case 3: zoom is mistaken for a physical change
The pupil enlarges the display and says the object has grown.
Repair: distinguish view controls from scientific inputs. Check whether the model’s stated dimensions changed. If only the view changed, the larger image is not evidence of a larger modelled object.
Case 4: the learner reads a paused scene
A pupil starts a process but does not notice that the tool is paused. The unchanged output is interpreted as evidence that the process has no effect.
Repair: inspect the run state. A paused model does not establish a scientific null result. Record what was actually running before interpreting the output.
Case 5: the unit changes
The pupil compares two output numbers without noticing that the unit or scale has changed.
Repair: recover the units, convert only when appropriate and compare the same quantity. A larger visible number is not automatically a larger physical or modelled value.
Case 6: one screenshot loses the input
A final output is saved, but the panel showing starting conditions is outside the screenshot.
Repair: add the relevant settings to the run record. The purpose is not to collect a larger image but to preserve enough information to reconstruct the comparison.
Case 7: a hidden random feature
A model contains variation between runs, but the learner expects identical output and labels every difference an error.
Repair: read the tool’s explanation and identify whether variation is part of the model. Compare the appropriate outcome or pattern rather than demanding an exact repeated number by habit.
Case 8: a perfect result becomes a universal claim
A virtual comparison works cleanly, so the pupil writes that the same numerical result must occur with every real apparatus.
Repair: state the model assumptions and identify the real-world measurement still needed. The model may predict a relationship without fixing every real outcome.
Case 9: the pupil can click but cannot explain
The child reproduces a sequence of actions quickly but cannot say what variable changed.
Repair: pause the interface task and use paper input cards. Ask the learner to choose a comparison and predict an outcome before returning to the tool. Operational fluency is not the same as conceptual understanding.
Case 10: a real discrepancy is dismissed
A physical shadow is less sharply defined than the idealised virtual shadow. The pupil says the real apparatus is wrong because it does not look like the screen.
Repair: inspect differences between the model and the physical setup. A real source and measurement process can introduce features omitted from an idealised representation. The discrepancy is a reason to compare assumptions, not to reject reality.
Case 11: simulation data are described as personal measurement
The pupil writes, “We measured a real shadow of 24 cm,” after reading only the imagined model table in this guide.
Repair: identify the source honestly: “The supplied model record gives 24 model cm.” A lesson can use constructed data without pretending it came from an experiment.
Case 12: a safety boundary disappears
A child tries a dramatic virtual condition and proposes recreating it physically without considering heat, light or electrical risks.
Repair: separate virtual exploration from permission to perform a real test. The teacher chooses a safe physical comparison or uses reference evidence. A simulation removes some physical hazards from the screen activity; it does not authorise recreating them.
8. Return to the real world deliberately
The best return task asks what stays the same and what needs new attention. For a shadow model, the source–object–screen relationship may transfer. The real task also requires stable positioning, a defined measurement boundary, a suitable ruler and safe handling.
Make a two-column bridge. In one column, record the relationship represented by the model. In the other, record the practical conditions required to test it with real objects. This prevents “the simulation worked” from being treated as the end of the enquiry.
| Model activity | Real-world return | New question |
|---|---|---|
| Change one displayed distance | Move one physical object while keeping the others fixed | How will we check the actual distances? |
| Read a clear modelled output | Read an instrument or define a visible boundary | How precise is the measurement? |
| Restore a saved baseline | Recreate the starting setup | What must be measured again? |
| Compare model runs | Repeat a physical comparison | Which variations remain uncontrolled? |
| Read selected explanatory paths | Use a drawing to explain the observation | What is represented rather than directly visible? |
Transfer without apparatus
A real-world return does not always require immediately running a physical experiment. The child can plan one, critique a supplied setup or interpret a teacher’s recorded evidence. The account should still identify which kind of work was performed.
For example, present a photograph description stating that the source and screen were fixed but the card angle changed. Ask whether it matches the virtual distance-only comparison. The pupil should notice the mismatch before trying to apply the model’s numerical output.
Use a changed representation
Rotate a diagram, replace a card with a toy or show the source on the opposite side. The relevant roles should remain recognisable. A learner who treats the source as “the thing on the left” needs a role-based repair.
The simulation has been useful when the child can identify those roles away from its familiar colours and controls.
9. The guided virtual-investigation workshop
This workshop is an original teaching design. It can use a suitable teacher-selected simulation, prepared model records or movable paper cards. It is not a set of instructions for an unverified app.
Part A: establish one learning goal
Choose a relationship the child has already encountered. For this workshop, use the effect of one specified object distance on a shadow in a fixed-source, fixed-screen arrangement.
Ask for an initial explanation or prediction without the interface. Keep the response. This makes it possible to judge whether the simulation improved the scientific model rather than merely entertained the group.
Part B: allow brief, purposeful orientation
Show what represents the source, object and screen. Identify which controls affect the system and which only affect the display. Ask pupils to explain one control back to the teacher.
Do not begin with an exhaustive tour of every feature. Teach the controls needed for the question. Extra features can remain unused without becoming gaps in the child’s understanding.
Part C: plan the comparison
Each learner proposes two or three settings. The group chooses a manageable set, writes what stays fixed and records a prediction. A teacher may reject a proposed setting because it falls outside the tool’s meaningful range, but should explain the reason.
The task now belongs to the pupils: they must decide how the comparison answers the question. The software is the tool, not the source of every decision.
Part D: run and record
One pupil operates the tool; another checks the starting-state record; another records outputs and asks whether units and inputs are clear. Rotate roles between runs. A projected whole-class version can assign these same thinking roles without requiring a device for every learner.
Before the next run, ask what is changing. After it, ask what the output means. Those two short pauses prevent a sequence of clicks from becoming a substitute for enquiry.
Part E: compare prediction and output
Each pupil writes an explanation before discussion. Did the output fit the prediction? If not, was the prediction scientifically weak, the input misunderstood, the model outside its useful range or the record incorrect?
Do not supply all possible answers at once. Ask the question most likely to reveal the first weak link. “Which distance did you move?” can be more useful than a long explanation of optics.
Part F: introduce one challenge
Show a run in which a second variable has changed. Ask whether it belongs in the original comparison. Alternatively, show a zoomed image without changed model dimensions and ask what actually changed.
This challenge tests control reasoning. The learner should not accept every output because it arrived from a computer.
Part G: close the screen and transfer
Present an unfamiliar drawing or a real-object plan. Ask the pupil to identify the same roles, predict a qualitative outcome and state one extra practical consideration.
The final product is a short explanation and a justified next test. It is not a record of how many minutes the child spent inside the simulation.
10. Choosing a suitable simulation
Start with the learning goal and inspect the tool before assigning it. A reputable provider can publish simulations for many ages and subjects. Reputation does not make every individual activity appropriate for a Primary 4 learner.
Check whether the intended relationship is represented accurately enough, whether the relevant controls can be understood, whether units and assumptions are clear, and whether the child can operate or access the tool with appropriate support.
A simulation that demands advanced vocabulary may be unsuitable for an independent P4 lesson even when the science is accurate. The teacher might select a limited part for demonstration or choose another representation. More sophisticated is not automatically more educational for the present task.
Access needs belong in the selection
Inspect the actual tool’s keyboard, touch, visual and audio options. Do not assume every simulation offers the same accessibility features. Provide a meaningful alternative—such as a verbal description, labelled cards or a prepared table—when the interface creates a barrier unrelated to the scientific goal.
PhET maintains an inclusive-design resource. It is a useful starting point for checking available support, but the teacher still needs to test the chosen simulation with the learner’s task and access needs.
Accounts and data should not become accidental requirements
Check school rules and the actual provider’s terms before asking a child to create an account, upload work or share personal information. A lesson about shadows does not inherently require public profiles, names or photographs.
This guide does not prescribe a login flow or promise that a particular feature is available without an account. Those product conditions can change. Keep the scientific task independent of unnecessary sharing.
Do not assign open browsing as the investigation
A child searching for “science simulation” may reach material intended for much older learners or unrelated topics. A bounded assignment should identify the tool or prepared record and the exact question. The research skill of choosing sources can be taught separately through Researching with Books, Websites and Secondary Sources.
11. Practice: judge the virtual investigation
Use these questions with the screen closed. They test the method of enquiry rather than knowledge of a particular programme.
- A learner changes source position and object size together. Can the output isolate the effect of source position? Explain.
- What three categories should a child identify when first examining a simulation?
- Why should a prediction be written before running the comparison?
- A zoom control enlarges the picture but the stated model dimensions remain unchanged. What has changed?
- Write a more precise version of “closer makes it bigger” for a shadow investigation.
- A reset action returns time to zero but leaves a selected material unchanged. What should happen before the next comparison?
- Why is one screenshot sometimes insufficient to reconstruct a virtual run?
- What is the difference between “the model predicts” and “we measured”?
- A deterministic simulation repeats an output exactly. Does that independently prove the same numerical result will occur with real apparatus?
- Must every simulation return identical results for repeated-looking runs? Explain.
- In the supplied idealised table, which input changes between Runs A, B and C?
- What should remain fixed when using those runs to investigate card–source distance?
- Why is a run with doubled card width unsuitable as a distance-only comparison with a run using the original card?
- A child reads only a qualitative model display. Should the child invent centimetre values from the size of the browser image?
- A physical shadow has a less distinct boundary than the virtual one. What should be compared before declaring either result wrong?
- Give one practical skill that a virtual display does not, by itself, demonstrate.
- Why should individual explanations be written before group discussion?
- What makes a simulation activity an enquiry rather than a clicking recipe?
- A dramatic virtual condition would be unsafe to reproduce physically. What is a responsible next step?
- What final task would show that the learner’s understanding transfers beyond the interface?
Worked answers and reasons
1. No. More than one relevant input changed. Restore a recorded baseline and vary only the intended factor for that comparison.
2. The represented objects, the changeable inputs and the displayed outputs. The child should also distinguish scientific controls from display-only controls.
3. It preserves the learner’s initial model and makes later comparison meaningful. Rewriting a prediction after seeing the output hides what changed in the reasoning.
4. The view has changed, not necessarily the represented physical system. The model’s values and settings determine whether a scientific input changed.
5. “With the source and screen fixed, moving the same card nearer the source is expected to produce a larger shadow in this arrangement.” The endpoints and controls are explicit.
6. Verify all relevant settings against the starting-state record. The meaning of reset depends on the chosen tool.
7. It may omit inputs, modes, units or earlier changes. A concise run record supplies the context needed to interpret the image.
8. The first identifies an output from model rules; the second identifies an actual measurement performed by the group. They can support different claims.
9. No. It shows repeatability within the model’s conditions. Real-world comparison requires attention to the physical setup, measurements and model assumptions.
10. No. Some models include random variation or internal states that differ between runs. Read the chosen tool’s explanation before interpreting variation.
11. Card–source distance changes from 10 to 20 to 30 model centimetres.
12. Source–screen distance, card width, orientation and other relevant model conditions should remain fixed.
13. Card width is another changed variable. The comparison cannot attribute the whole output difference to distance alone.
14. No. Use qualitative observations or documented model quantities. Display size alone does not establish a real-world unit.
15. Compare source characteristics, geometry, measurement method and the simplifications in the model. A real apparatus can contain features omitted from an idealised representation.
16. Examples include aligning a real ruler, positioning a thermometer safely, controlling physical distances or defining a fuzzy shadow boundary.
17. So each learner’s interpretation becomes visible before a dominant voice supplies a shared answer. Group work should not hide individual understanding.
18. The learner makes a prediction, chooses or justifies a controlled comparison, records relevant outputs and explains the result rather than merely following actions with supplied conclusions.
19. Use a safe equivalent, teacher-provided evidence or a discussion of the model’s boundary. Virtual access does not authorise a hazardous real experiment.
20. A changed diagram, new surface example or real-apparatus plan that requires the same relationship without the familiar controls.
12. A tutor’s diagnostic map
When a child struggles, identify whether the problem lies in the Science, the interface, the record or the comparison. These require different repairs.
| What happens | Likely problem to investigate | Smallest useful repair |
|---|---|---|
| Correct prediction, wrong button sequence | Interface knowledge | Show the relevant control without supplying the conclusion |
| Fast clicking, no variable identified | Investigation purpose | Write the question and changed input |
| Different outputs, hidden setting changed | Starting-state control | Use a baseline card and verify reset |
| Correct output, unsupported universal claim | Evidence boundary | State what the model actually supports |
| Success on screen, failure in a rotated diagram | Representation dependence | Identify roles and invariant relationships |
| Child cannot use the interface comfortably | Access barrier | Use an appropriate alternative representation |
This table is a teaching aid, not a standardised diagnostic instrument. Its purpose is to prevent one remedy—usually more screen time—from being applied to every kind of difficulty.
Ask for the reasoning that the interface cannot supply
“Why did you keep that setting fixed?” “What would make this comparison unfair?” “Which result comes from a calculation in the model?” “What would you measure physically next?” These questions reveal judgement beyond operating the tool.
Stop the activity when the learning goal has been demonstrated and one meaningful transfer has been checked. More runs are useful only when they answer another question or test an unresolved part of the model.
Sources and further routes
The teaching references are PhET’s official small-group and independent-work guidance, whole-class teaching guidance, research overview and inclusive-design resource. The numerical shadow case in this article is an original supplied model record, not data taken from those sources or from a named simulation.
Within the P4 library, use Scientific Models and Their Limits for the general model idea, Physical Model-Making, Testing and Revision for tangible representations, and Practical Tests and Performance Tasks for real apparatus skills.
Readers ready for a later examination-focused discussion can continue to PSLE Science Reality Lab: Is a Model Prediction the Same as an Observation?. It develops a different, later-stage evaluation task rather than replacing this P4 guided-use lesson.
The companion evidence guides are Researching with Books, Websites and Secondary Sources, Data Loggers, Sensors and Automatic Measurements, and Photographs, Video and Time-Lapse Observation. Return to the Primary 4 Science Learning Hub to choose the underlying scientific topic.
In the fictional classroom, Alicia can still move the virtual card in an instant. The difference is what she says afterward. She identifies the input, the fixed conditions and the modelled output. Then she proposes a safe physical comparison and names what will need measuring.
The screen has made a relationship easier to explore. The learner has learned how to carry that relationship back into the world without mistaking the model for the world itself.
