
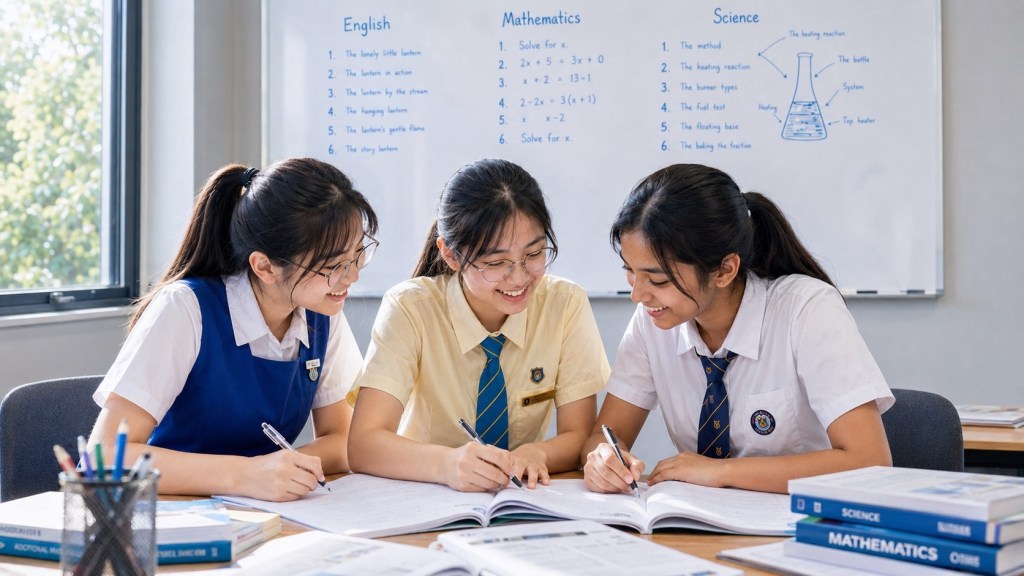
The whiteboard study method works well for Science because it makes thinking visible, temporary and easy to rebuild. A blank board removes the comfort of completed notes. Students have to retrieve a diagram, reconstruct a mechanism, solve a calculation, explain a graph or map an experiment from memory. Then they can erase it and try again. For parents searching for whiteboard study methods, active recall, Science revision techniques, PSLE Science revision or Secondary Science tuition in Sengkang, the strength of the method is that it creates a large external workspace for retrieval and correction.
The University of Pennsylvania’s Weingarten Center describes whiteboard study as a way to test knowledge by writing down what you know, identifying what remains weak and following up with targeted review and practice. For Science, the board is especially useful because the subject depends on words, diagrams, equations, tables, graphs and causal chains. A page can feel cramped; a board encourages students to connect these representations.
This guide uses a five-step Science routine: retrieve → represent → solve → check → erase and rebuild. The final erase matters. A completed board should not become another set of notes to stare at. The learner should eventually be able to reconstruct the important Science again.
Quick answer: the whiteboard Science cycle
- Write the topic only. Keep notes closed.
- Retrieve the big idea. Add key terms and mechanisms.
- Represent it. Draw the diagram, graph, model or equation.
- Solve or explain. Complete one application without support.
- Check. Compare with reliable material and mark gaps.
- Erase. Remove the completed version.
- Rebuild later. Repeat from memory after a delay.
Why a whiteboard suits Science
Science knowledge is often relational. A student needs to see how a condition affects a process, how a structure supports a function, how data connect to a model, or how one variable changes another. A whiteboard gives enough space to put these relationships beside one another.
It also supports correction. A weak arrow can be erased. A graph can be redrawn. A formula can be rearranged again. The temporary nature of the board encourages iteration rather than treating the first written version as final.
Whiteboard method for Primary Science
Primary students can use a board to draw systems, compare materials, map life cycles, label diagrams and build cause-and-effect chains. Keep the board simple. One concept, one diagram, one mechanism and one transfer question are enough for a short session.
For Primary 3 and 4, use more pictures and concrete examples. For Primary 5 and 6, add graph interpretation, experimental variables and open-ended explanation planning.
Whiteboard method for PSLE Science
A useful PSLE board has four zones: concept, evidence, mechanism and question. Retrieve the concept, place the relevant data or diagram beside it, write the causal chain, then answer one exam-style question. This mirrors the reasoning students need when a PSLE item combines content and application.
After checking, erase the model answer and keep only the future cue: compare both cases, state the variable, explain the mechanism, use the data. Then rebuild on a fresh question.
Whiteboard method for SEC G1, G2 and G3 Science
Secondary students can split the board into multiple representations. Physics: model, equation, graph and interpretation. Chemistry: observation, particle explanation and symbolic form. Biology: structure, function, process and system effect. The exact depth should follow the student’s current SEAB syllabus.
Board routine 1: draw the mechanism
Write the starting condition on the left and the outcome on the right. Force yourself to fill the middle. What moves, transfers, changes, reacts or interacts? This exposes answers that jump from question condition to final result without a mechanism.
Board routine 2: redraw the diagram
Study a diagram briefly, hide it and redraw from memory. Then label what each part means and explain the relationships. Do not reward visual similarity alone. The learner should know why the arrow, branch, boundary or label matters.
Board routine 3: solve one calculation three ways
First explain the quantities and relationship in words. Second write the equation and units. Third solve the numerical example and interpret the result. This prevents calculation from becoming symbol manipulation detached from Science.
Board routine 4: graph from memory
After studying a relationship, sketch the expected graph and label axes and units. Then explain why the graph should have that pattern. Compare with the real data afterward. This connects models to representations.
Board routine 5: experiment map
Create boxes for question, changed variable, measured outcome, controls, method, evidence and conclusion. Ask the student to rebuild the experiment logic without reading the procedure. If the learner cannot explain why a control matters, that becomes the repair target.
The erase rule
Do not preserve every successful board forever. Take a photo only if needed for checking or tutor records, then erase. The educational goal is to internalise the structure, not accumulate pictures of completed boards.
When the student returns later, the blank surface should trigger another retrieval attempt. Rebuilding is the point.
Common whiteboard mistakes
- copying notes onto the board;
- making the board decorative rather than diagnostic;
- using only keywords without mechanisms;
- never checking against a reliable source;
- leaving the completed board visible for days and calling that revision;
- solving familiar examples only;
- letting one student dominate a group board.
The 20-minute whiteboard Science session
- 3 minutes: write the concept and retrieve the big idea.
- 5 minutes: draw the model or mechanism.
- 5 minutes: solve one application.
- 4 minutes: check and correct.
- 3 minutes: erase the correction and reconstruct the weak part.
Whiteboard revision for three students
Give each student a separate first attempt so individual evidence is preserved. Then use the large board for comparison. Student A contributes the model, Student B the data interpretation and Student C the explanation. Rotate roles. The tutor can see where reasoning differs and prevent answer leakage from replacing independent work.
Whiteboard versus blurting
Blurting is free recall across a topic. Whiteboard study is more flexible because it can include problem solving, diagrams and collaborative explanation. A blurt can be done on a whiteboard, but not every whiteboard session is a blurt.
Whiteboard versus notes
Notes are a stored resource. The board is a working surface. Use notes to verify; use the board to retrieve, manipulate and rebuild. Keeping these roles separate reduces passive copying.
How parents can use a small whiteboard at home
Ask the child to teach one idea on the board. Do not correct immediately. Mark where the explanation becomes vague, then check the source together. Finish by erasing the repaired section and asking the child to redraw it.
Useful eduKate Sengkang routes
- Master Science Tutorials Quickly | Blurting Method for Science Revision
- Master Science Tutorials Quickly | Feynman Technique for Science
- Master Science Tutorials Quickly | Science Revision Notes
- Complete Science Index
- University of Pennsylvania | White Board: A Study Strategy
Frequently asked questions
Do students need a large whiteboard?
No. A small board or blank paper can work. The benefit comes from retrieval and reconstruction, not the equipment.
Should students photograph every board?
Usually no. Photograph only when a tutor needs a record or the board contains a useful error map. Rebuilding later is more important than saving every finished version.
Can it help Science calculations?
Yes. Use the board to connect the meaning, equation, units, working and interpretation rather than practising arithmetic alone.
The whiteboard Science receipt
A good whiteboard session ends with a board that can be erased because the important structure is becoming internal. The student should be able to redraw, explain or solve the Science again later with less support.
